Here are some of the guidelines for adding contents to the site with basic elements (title, text) and more advanced stuff (images, category, tags, etc.).
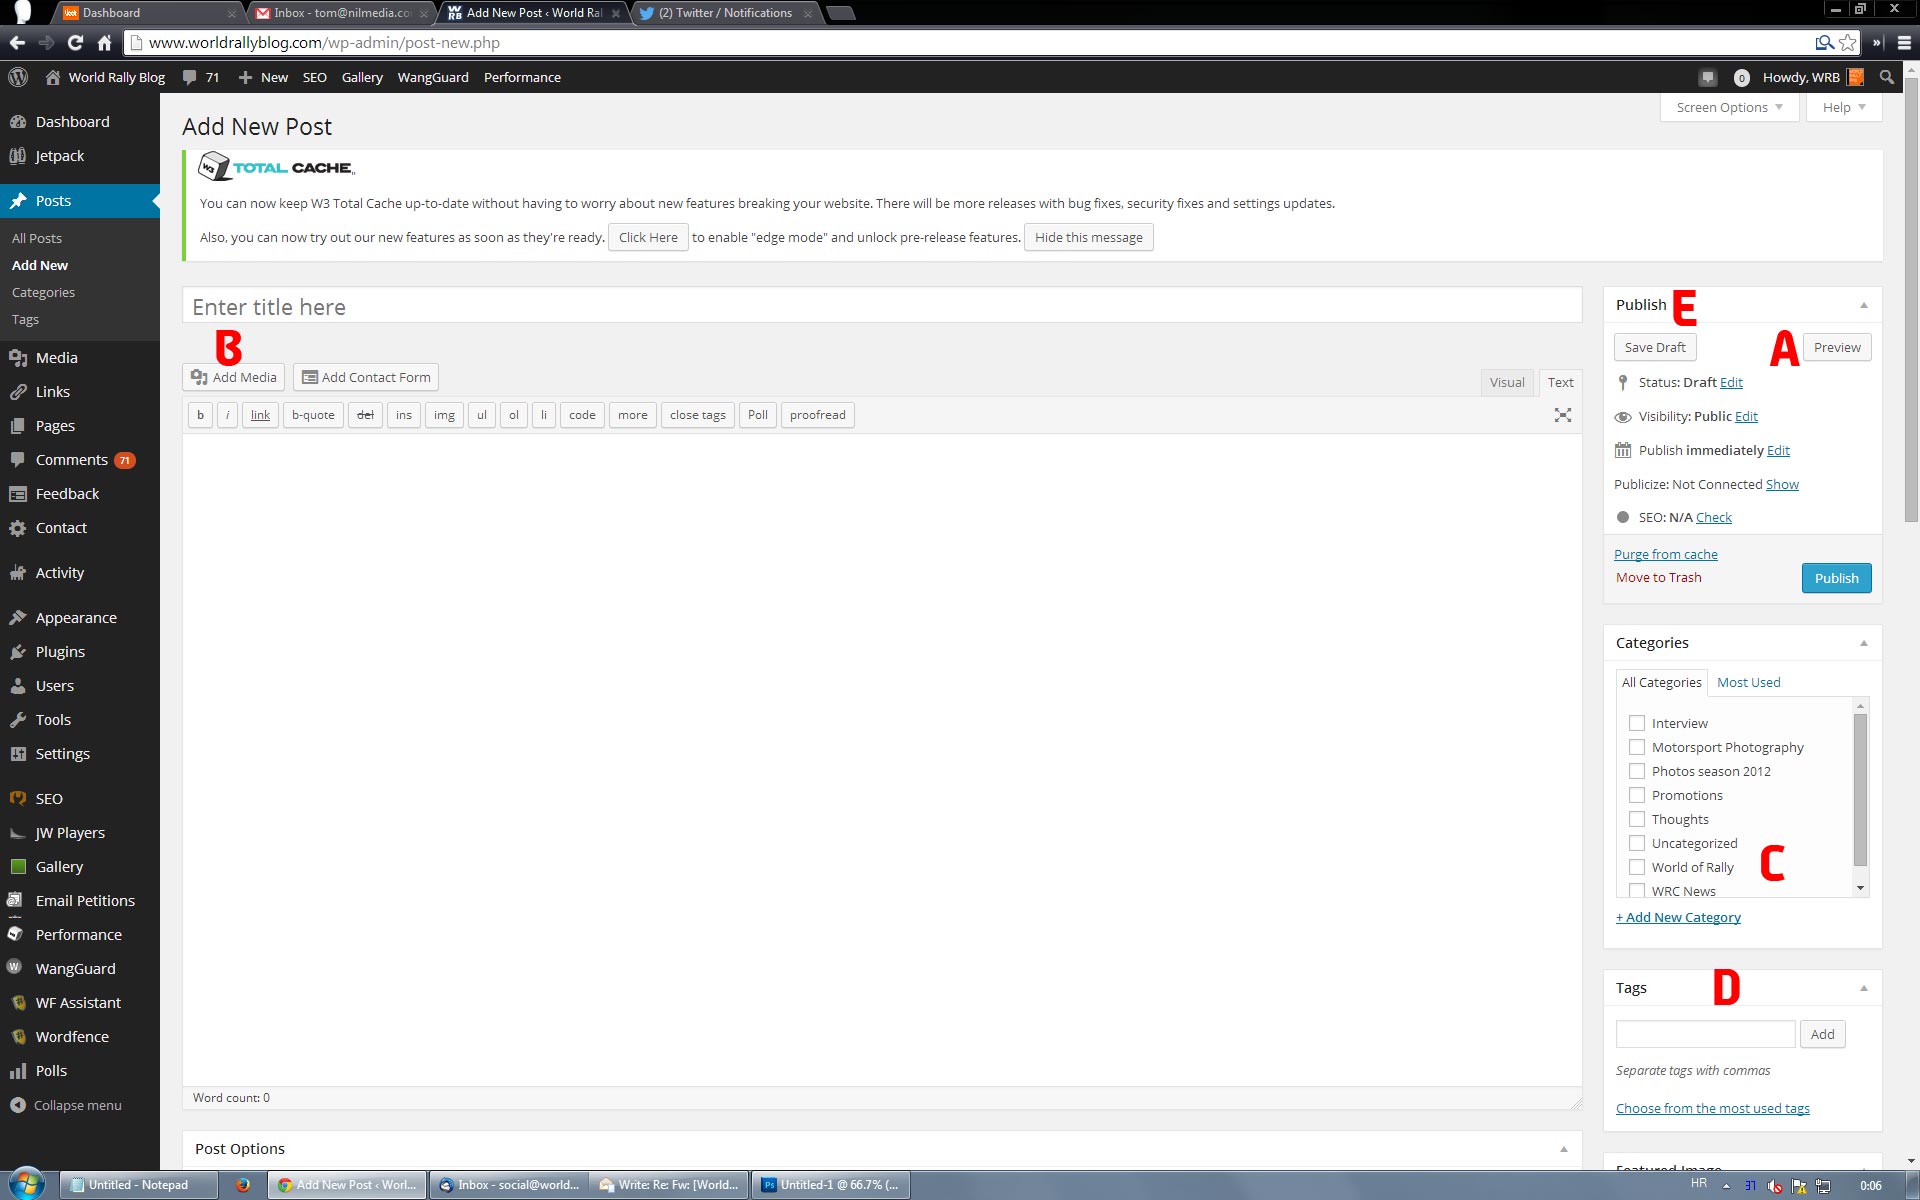
Screen 1.
On this screen we can see several key elements of the post. During any stage of the post construction or editing you can preview changes by clicking on Preview button (mark A). To add image you will use the button Add Media (mark B – explained later). Category is selected by using selector (if available to you) noted by mark C. In the field marked by mark D you will add tags (single words or phrases, separated by comma). Finally, in order to keep all the changes you will click on Save Draft (mark E) button, which will save the changes but post will remain unpublished (suggested for the first few posts so we can work out the best workflow for you together).
IMAGES
To add image, please consult the screenshot below.
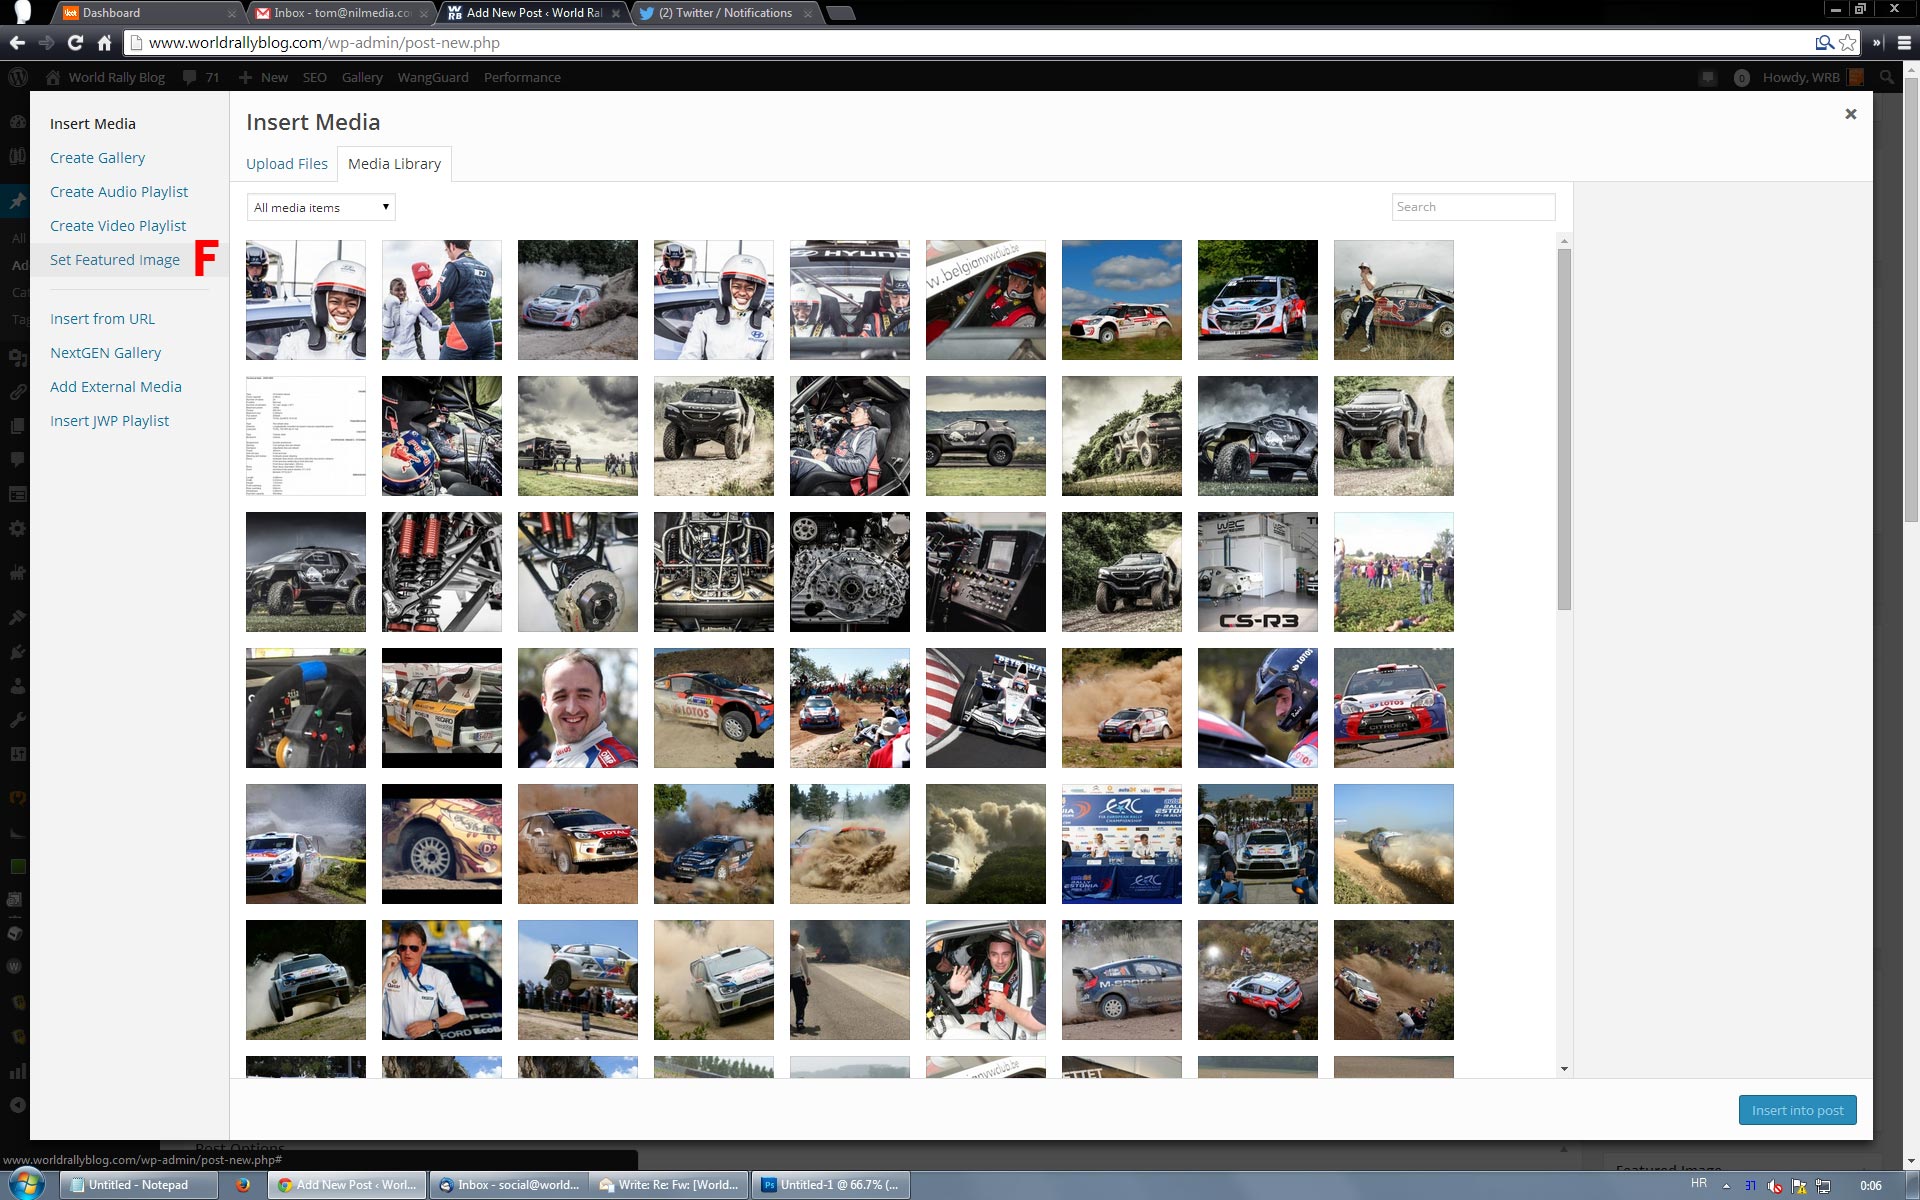
Screen 2.
After clicking on mark B from previous screen you will end up on a screen similar to Screen 2. Click on mark F to switch to “Featured Image” handling. Screen will change to look like Screen 3 below.
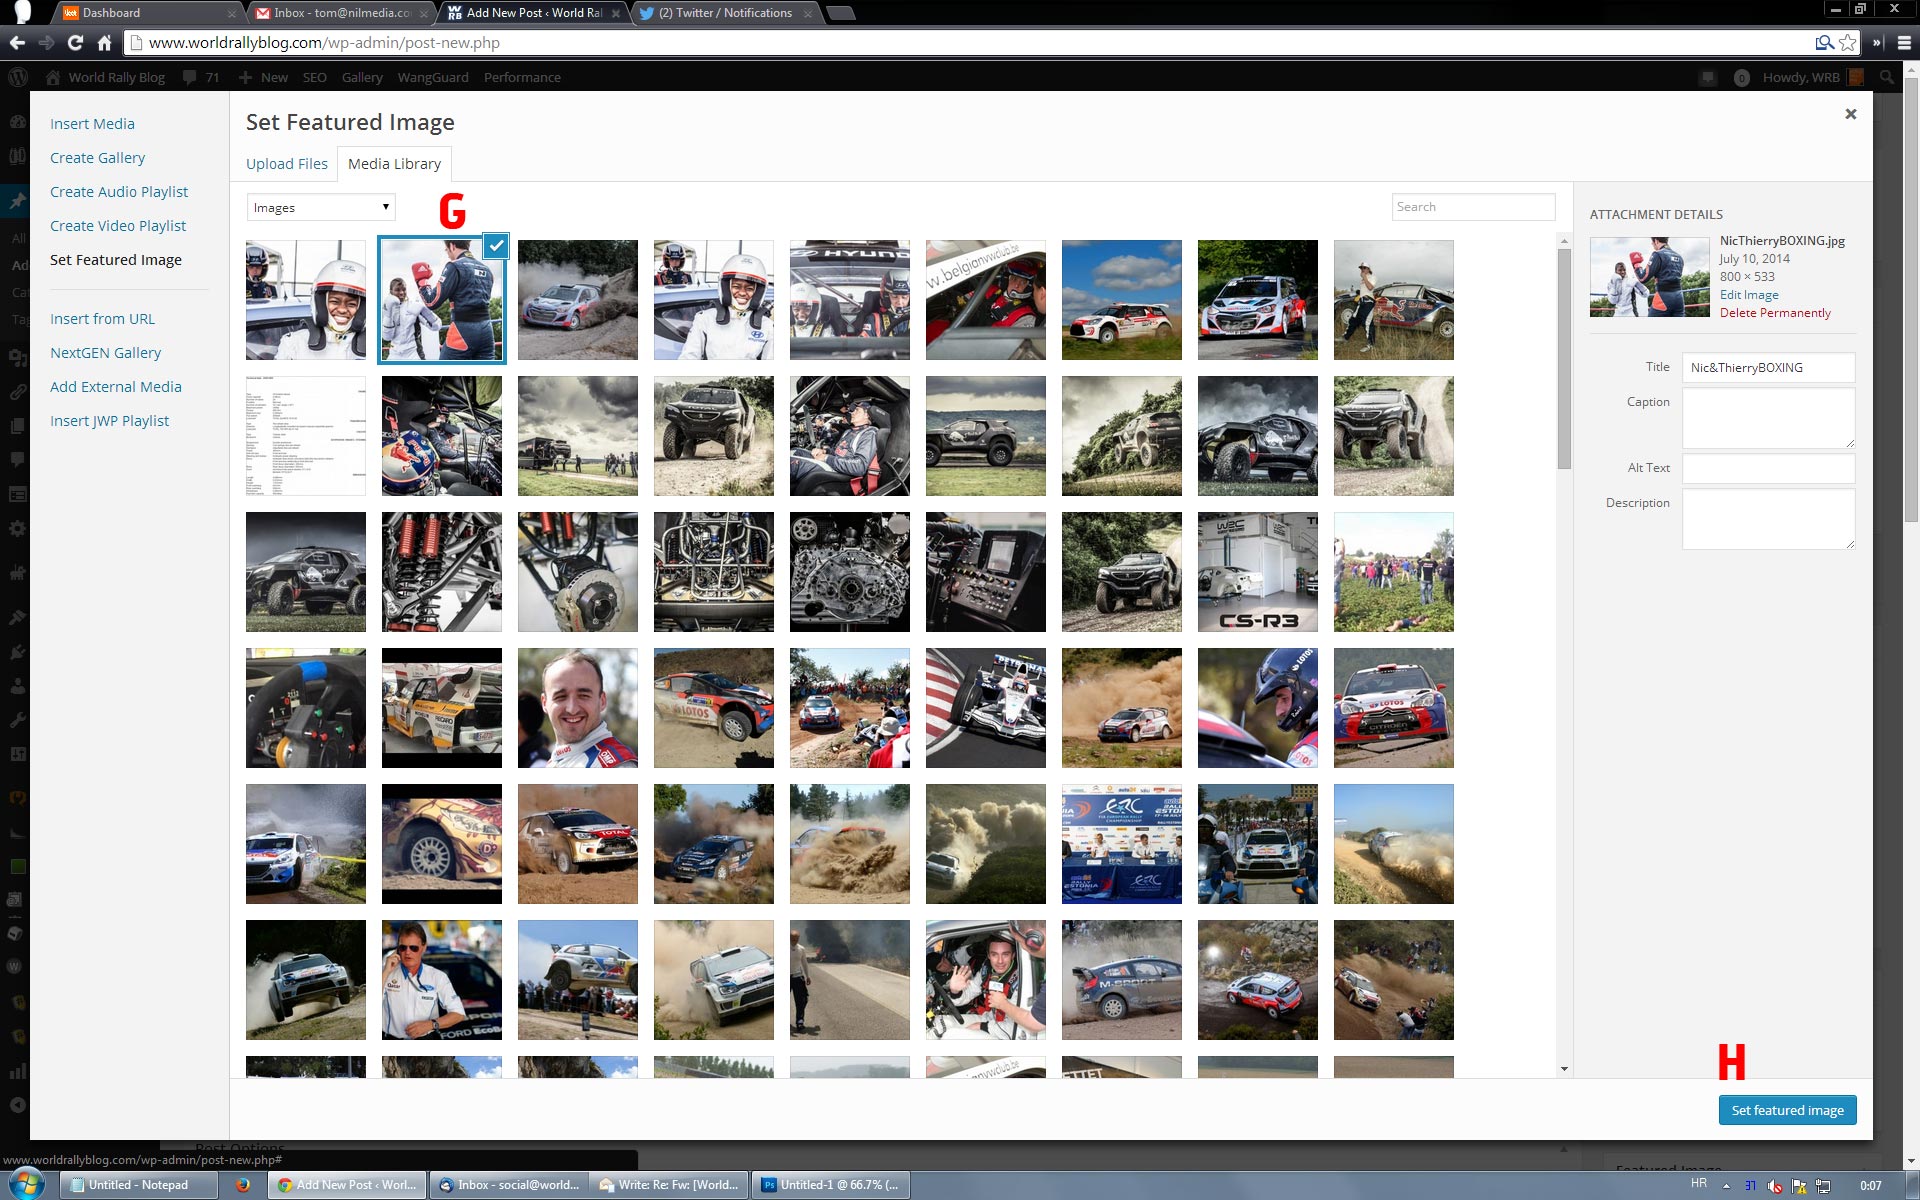
Screen 3.
On this screen you can see a list of images and an option to upload image (left of mark G). If the image you wish to use is already on the server, you simply click on it to mark it (as shown by mark G) and then click on mark H to confirm this image to be used as Featured Image for this post.
Save change by “Save Draft” button and that should be it for this phase.
Do let me know how you get on and if there’s anything else you want me to explain!